Before You Rip and Tear — Key Info
| Detail | Info |
|---|---|
| Developer | id Software |
| Publisher | Bethesda Softworks |
| Price | $59.99 |
| Platforms | PC (Steam), PS5, Xbox Series X/S |
| Metacritic | 85/100 |
| Steam | Buy DOOM: The Dark Ages |
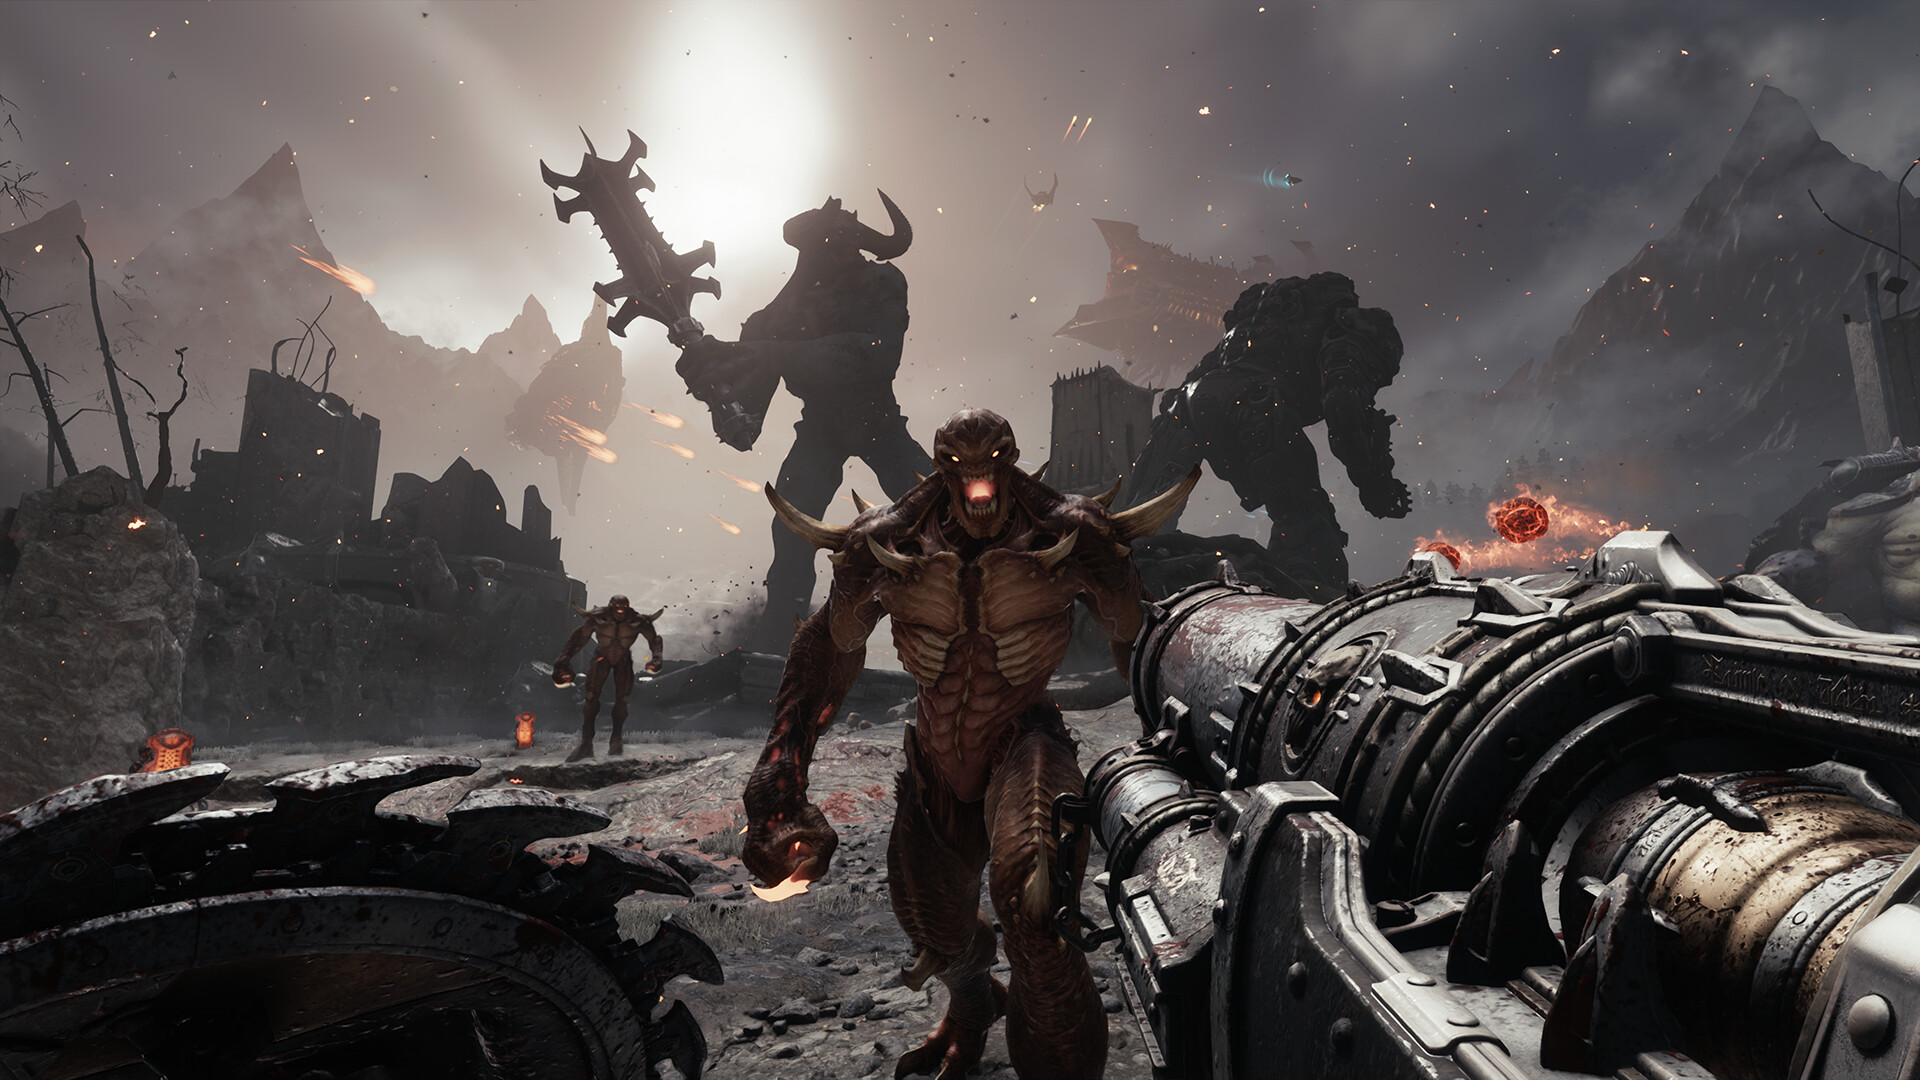
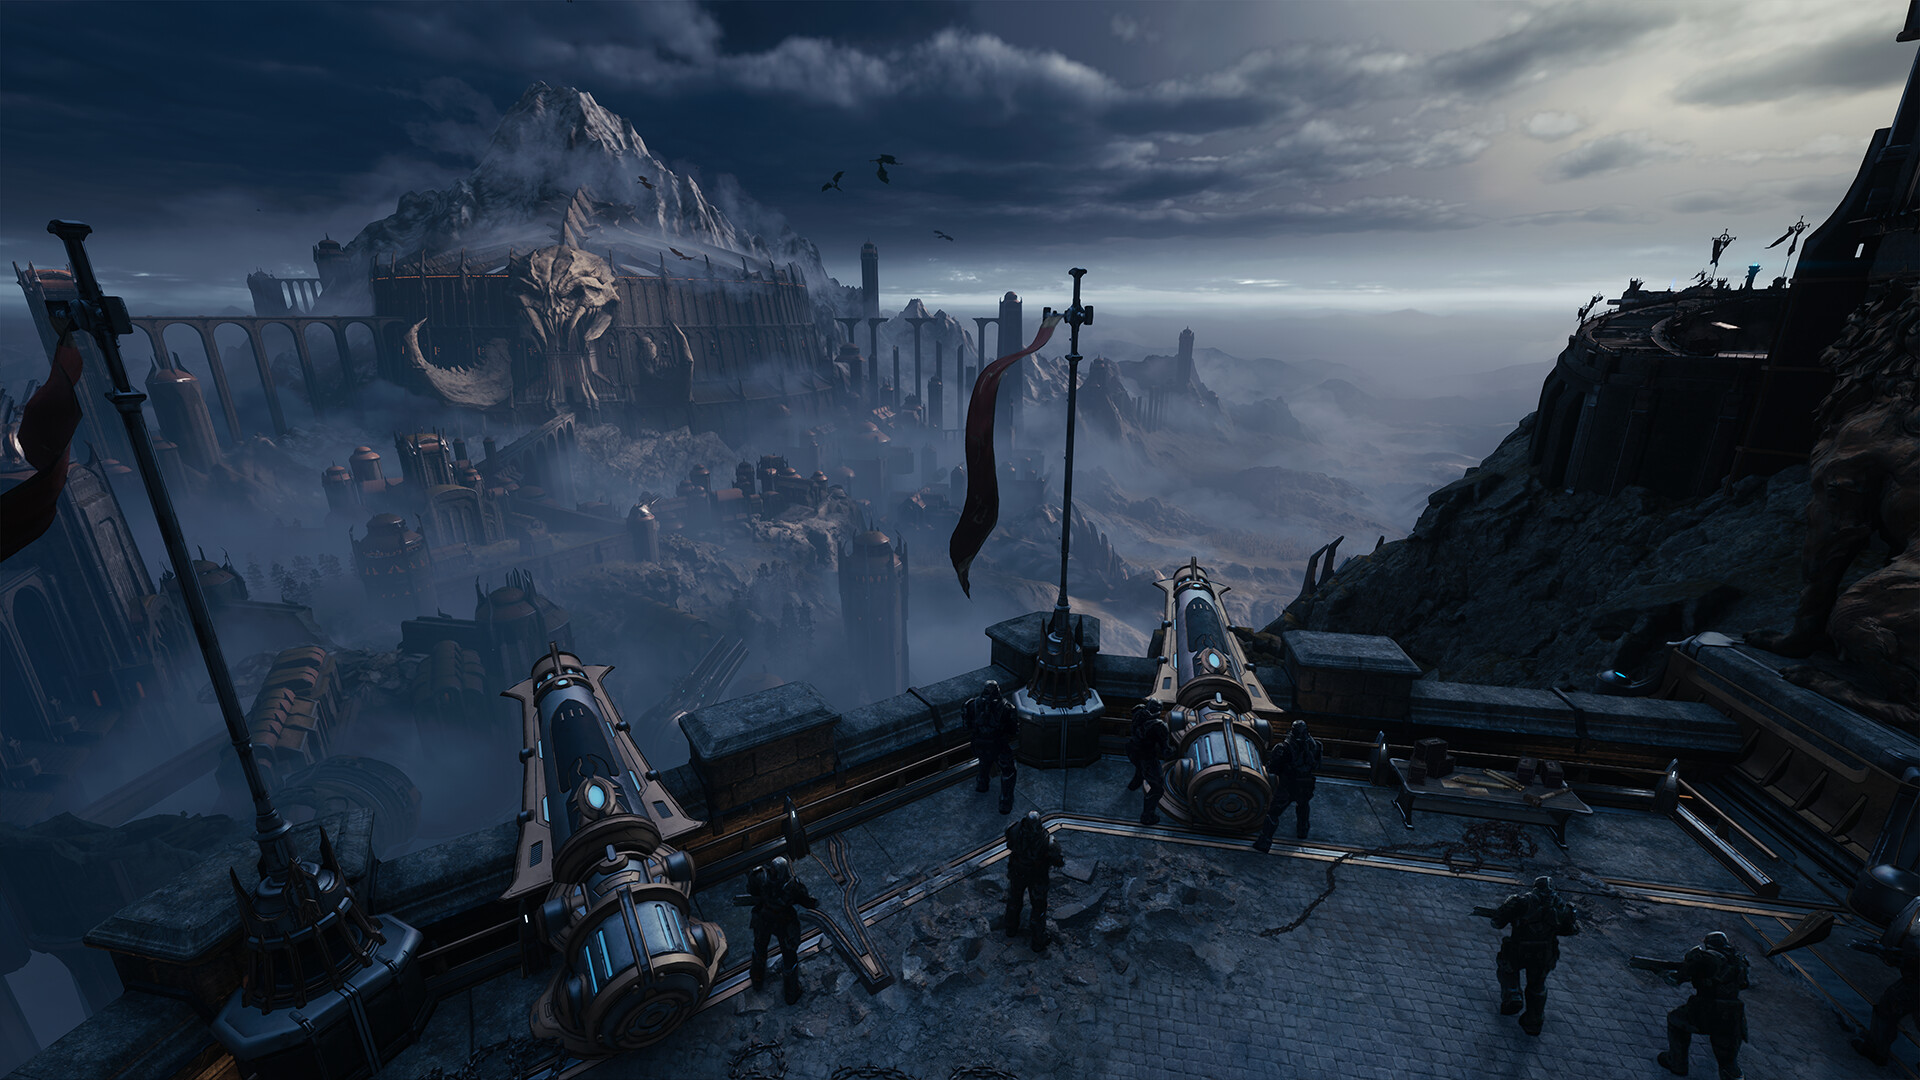
DOOM: The Dark Ages earns its Metacritic 85 through confident, deliberate reinvention. id Software moved the franchise from Eternal's frantic aerial pinball into something heavier and more grounded — a medieval fantasy battleground where the Doom Slayer wields a shield, rides dragons, and carves through demonic hordes with a purpose-built arsenal. The weapons feel distinct. The upgrade tree has teeth. And if you walk in expecting Eternal's pace, you'll need to adjust.
This guide covers every weapon in the arsenal, the Shield Saw system, dragon riding, the push-forward combat loop, upgrade priorities, difficulty-specific tips, and the mistakes that kill new players in the first few hours.

🎬 Official Trailer
Every Weapon — Use Case, Range, and Upgrade Priority
DOOM: The Dark Ages ships with eight weapons. Each fills a distinct role in the combat loop, and none of them are dead weight if you use them correctly. Here is every weapon broken down.
Shotgun
Best use case: Close-quarters demon deletion, resource generation, emergency melee extension.
Effective range: Point-blank to short. Damage falloff is steep beyond 10–15 meters. This is a contact weapon.
What it does well: The Shotgun is your bread-and-butter damage tool for the first half of the game. It staggers lighter enemies reliably, generates glory kill opportunities quickly, and keeps pressure on mid-tier threats that would otherwise close the distance on you. Pellet spread means you don't need to aim precisely — useful when multiple enemies are stacking.
What it doesn't do well: Armored heavy demons shrug it off. Do not use it against the Cyber-Knight or any shielded enemy type — you'll waste ammo for almost no payoff.
Upgrade priority: High. Increase pellet count first. The second-tier upgrade that extends stagger duration is extremely valuable in crowd situations — invest in it before moving to other weapon trees.
Railgun
Best use case: Long-range precision, shield stripping, punching through lines of grouped enemies.
Effective range: Unlimited. It's a railgun. One shot, one beam, anything in the path takes damage.
What it does well: The Railgun fills the sniping role the series often neglects. Against shielded demons, it removes shields in a single hit regardless of shield type — this is invaluable. The penetration mechanic means a well-angled shot can damage three or four enemies in a row. In open arenas, good Railgun usage separates efficient players from inefficient ones.
What it doesn't do well: Single-target projectile velocity means close-range fast enemies can dodge the beam. Not designed for crowd suppression. Charge time is long — pulling it out against a melee rush is a mistake.
Upgrade priority: Medium-High. Prioritize charge time reduction first, then penetration damage amplification. Ammo is scarce early, so make each shot count before you invest in capacity upgrades.
Plasma Rifle
Best use case: Sustained mid-range suppression, energy-shielded enemy removal, chip damage accumulation.
Effective range: Short to mid. Plasma rounds lose velocity and accuracy at long range.
What it does well: The Plasma Rifle is your workhorse against everything the Shotgun can't reach. It strips energy shields off possessed demons almost instantly — faster than any other weapon — and the continuous fire gives you fine control over which target is taking damage. Against flying enemies, it's the most consistent option in the arsenal.
What it doesn't do well: Physical armor is resistant to plasma damage. Armored heavies require kinetic weapons. Don't waste plasma on Hellknights or Baron types.
Upgrade priority: Medium. The plasma burst upgrade (fires a larger charge on max heat) is strong in extended fights but requires discipline to use. Prioritize fire rate before burst capacity.
Heavy Cannon
Best use case: Armored heavies, vehicles, mid-range sustained punishment.
Effective range: Mid to long. More accurate and stable than the Shotgun at distance, less precise than the Railgun.
What it does well: The Heavy Cannon is the dedicated armor-breaker. Where other weapons struggle against plated demon variants, the Heavy Cannon's kinetic rounds bypass a portion of physical armor on every hit. It also deals high single-target DPS when landing consistent shots — in long corridors and open arenas, it's extremely efficient. Dragon-back sections where you need sustained accurate fire benefit heavily from this weapon.
What it doesn't do well: Close range against fast enemies is uncomfortable. The fire rate isn't low enough to call it a sniper but high enough that ammo drains quickly if you're not disciplined.
Upgrade priority: High. The armor penetration passive upgrade should be your first investment — it changes what this weapon can kill. Damage-per-shot upgrades come second.
Chaingun
Best use case: Sustained crowd suppression, overwhelming mid-tier demons, area denial.
Effective range: Close to mid. Effective at suppressing groups in tight arenas.
What it does well: Once the Chaingun spins up, it outputs enormous DPS against unarmored and lightly armored targets. In arena fights with waves of mid-tier demons — Imps, Gargoyles, Possessed Infantry — the Chaingun clears rooms faster than almost anything else. It excels when you're in a defensive position because the sustained output means enemies can't push through without taking massive damage.
What it doesn't do well: Spin-up time is a vulnerability. Pulling out the Chaingun mid-dodge is dangerous — you need a brief moment of stability to bring it to full speed. Against single armored heavies, you're better off switching weapons.
Upgrade priority: Low-Medium. Spin-up reduction is useful but not transformative. Save resources for Shotgun, Railgun, and Shield upgrades first.
Rocket Launcher
Best use case: Grouped heavy demons, boss weak points, high-ceiling arenas where splash damage can hit multiple targets.
Effective range: Mid. Rockets have travel time — leading targets at range is required.
What it does well: Splash damage that bypasses a portion of armor makes the Rocket Launcher the strongest single-shot weapon against multiple armored enemies in proximity. Boss fights that expose clustered weak points — the Siege Titan's ankle joints, the Cyber-Baron's shoulder cannons — are made dramatically easier with precise rocket placement. It also serves as a budget Glory Kill extender: splash to weaken, close in for the finisher.
What it doesn't do well: Self-damage is live. Close-range use without cover will hurt you. Don't fire into low ceilings unless you know the splash radius.
Upgrade priority: Medium. The proximity detonation upgrade (rockets detonate near targets instead of requiring direct hits) is worth investing in early. Blast radius second.
BFG 9000
Best use case: Room-clearing panic button, boss burst windows, cutting down elite enemy clusters.
Effective range: Massive AoE, best used in medium-to-large open spaces.
What it does well: The BFG is the strongest weapon in the arsenal and the answer to every situation where you've lost control of a fight. One charge clears a room of normal enemies. Against bosses, the BFG opens a window of free damage that few other weapons can match. The secondary plasma tendril effect means enemies near the primary target also take substantial damage.
What it doesn't do well: This is not a primary weapon. Ammo is rare. Treating the BFG as your main damage source will leave you dry against a boss you actually need it for. Reserve it.
Upgrade priority: Do not upgrade this first. BFG ammo capacity upgrades are useful but only matter if you're using the weapon correctly — save the resources and invest in weapons you'll use every fight.
Crossbow
Best use case: Stealth priority targets, eliminating support demons before they buff the main fight, silent room entry.
Effective range: Long. The Crossbow is a precision weapon with no damage dropoff.
What it does well: The Crossbow is unique in the arsenal because it enables a different approach to combat: initiation. Before entering a major fight, you can thin the enemy composition from range — taking out shambler-type demons that buff nearby enemies, or flagging a Revenant that would otherwise rocket-spam from cover. One-hit kills on lesser demons make it excellent for clearing corridors quietly. It also deals bonus damage to demon weak points, making it an underrated boss tool.
What it doesn't do well: Manual reload after every shot. In active combat, switching to the Crossbow mid-fight is almost always the wrong move unless you have clear line of sight and a static target. This is a pre-fight weapon.
Upgrade priority: Low-Medium for most players. Invest in capacity and reload speed only if you regularly open fights at range. For aggressive players who push into arenas immediately, other upgrades take priority.
Slayer Abilities & The Shield System
The Shield Saw — Your Most Important Tool
The Shield Saw is the defining mechanical addition of The Dark Ages, and understanding it at a deep level separates players who struggle in the late game from those who dominate it. It has three distinct functions:
Block: Hold the block input before a telegraphed attack and the Shield Saw absorbs the hit with no health cost. Enemies signal blockable attacks with a yellow visual indicator. This is your primary survival tool against melee-heavy demons. Learning which attack animations are blockable and which cannot be blocked is the most important knowledge in the game.
Parry: Time your block release at the exact moment of impact — within a narrow window — and you execute a parry. A successful parry launches the demon back, opens a counter-attack window, and in some cases triggers an instant execution on weaker enemy types. The parry window varies by enemy. Imps and Gargoyles have generous windows. Elite demons — Cyber-Knights, Baron-class enemies — have tight windows that require practice. On Ultra-Nightmare, parry timing is your survival margin against bosses.
Throw: The Shield Saw can be thrown as a projectile. Against grouped enemies, a thrown shield follows a bounce path and hits multiple targets — this is the most resource-efficient crowd tool in the game outside the BFG. Against a single armored heavy, a shield throw removes a portion of physical armor before engagement, setting up your Heavy Cannon or Rocket Launcher. The throw also stuns flying demons mid-air, grounding them for a follow-up melee combo. Do not neglect this — new players treat the throw as a gimmick, experienced players use it every fight.
Shield Saw upgrades: Invest in parry window extension early. It dramatically reduces the skill floor of the parry system and makes the late game significantly more manageable. Throw damage amplification is the second priority. Shield durability upgrades are the least impactful — the block system regenerates quickly enough that increased base durability provides minimal real-world benefit.
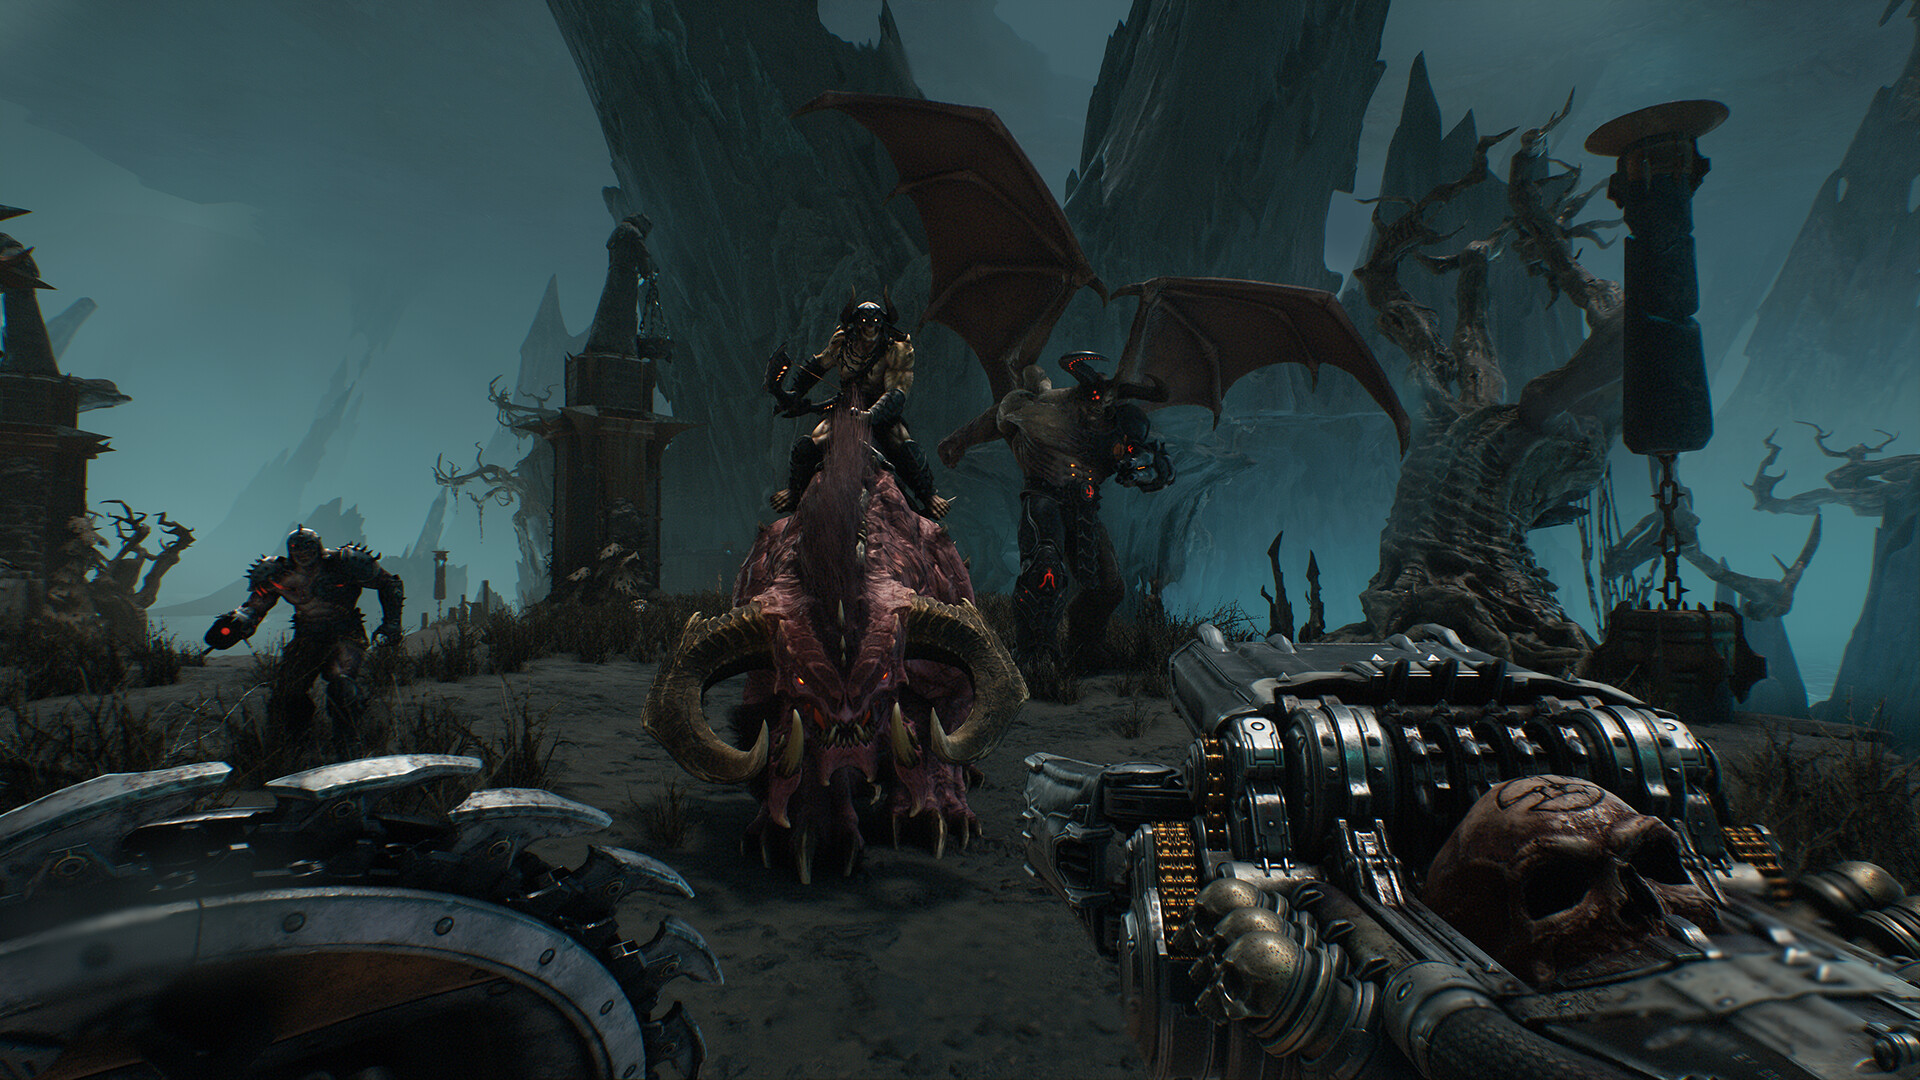
Dragon Riding
Dragon-riding sequences appear in specific campaign chapters and serve as spectacle set-pieces with distinct mechanics. The dragon's primary attack is a sustained fire breath — it damages everything in its cone and destroys light demonic constructs in a single pass. Chain the fire breath against clusters of airborne demons for maximum efficiency.
The dragon also has a dive-bomb ability that deals enormous AoE damage on impact and is best used against Siege Titan encounters in aerial chapters. Altitude management matters: staying low decreases effective fire-breath range but makes the dive-bomb easier to execute. Staying high extends the fire breath cone but makes the dive-bomb harder to land precisely.
Dragon-riding sections do not use your regular weapon loadout — focus on timing the fire breath against large clusters rather than trying to target individual enemies. Health management does not carry over from dragon sections into ground sections, so do not play conservatively thinking you're preserving health you'll need later.
Combat Philosophy — How The Dark Ages Wants You to Fight
Push-Forward, But Differently Than Eternal
DOOM 2016 and DOOM Eternal built their combat philosophy around kinetic aggression — the resource loop required constant movement, constant engagement, and constant threat of death if you stopped. The Dark Ages keeps the push-forward principle but changes what it means.
In Eternal, push-forward meant never stop moving. In The Dark Ages, push-forward means stay in the demon's face but be deliberate about it. Aerial platforms, dash mechanics, and double-jumps are gone or significantly reduced. The Doom Slayer is a ground-based, shield-carrying juggernaut. Your default fighting position is close range, where the Shield Saw can absorb hits and your Shotgun can stagger enemies into Glory Kill range.
The practical implication: do not default to retreating. Retreating removes you from the Shield Saw's protective range, wastes positioning advantage, and in arena fights with multiple enemies, creates angles of attack you cannot block simultaneously. The correct response to pressure in The Dark Ages is almost always to step into it, not away.
Melee Emphasis
Melee in The Dark Ages is not the emergency tool it was in previous entries. Ground Pound and basic melee attacks generate health drops on kills against weakened enemies, create stagger opportunities, and set up Glory Kills that restore significant health on higher difficulties. A full combat loop looks like:
- 1Open with Railgun or Crossbow against shielded targets or priority support demons
- 2Close distance immediately using the shortest path
- 3Shield block / parry incoming attacks to negate damage
- 4Shotgun or Plasma Rifle to weaken main target
- 5Melee combo into Glory Kill to restore health
- 6Rocket Launcher or Heavy Cannon against armored heavies in the group
- 7Repeat — do not retreat to "reset"
The Resource Loop
Health, ammo, and armor all refill through aggressive play. Glory Kills restore health proportional to the enemy's max HP. Chainsaw kills (when fuel is available) restore ammo across all weapons. Shield parries restore a small amount of armor on success.
This means passive play — staying at distance, chipping away — actively penalizes you by denying the resource drops that keep you alive. The game is balanced around constant engagement, and difficulty spikes in the back half of the campaign almost always punish players who developed passive habits in the early chapters.
Upgrade Priority Order
If you want a direct priority order for resource allocation across weapons and the Shield Saw, here is the recommended sequence for most difficulty levels:
- 1Shield Saw — Parry Window Extension: The most impactful upgrade in the game. Install immediately.
- 2Shotgun — Pellet Count: Dramatically increases stagger rate and damage output at close range.
- 3Shotgun — Stagger Duration: Extends the window to set up Glory Kills. Converts near-kills into confirmed kills reliably.
- 4Railgun — Charge Time Reduction: Makes shield-stripping viable in live combat rather than only pre-engagement.
- 5Heavy Cannon — Armor Penetration Passive: Unlocks a whole category of efficient engagements.
- 6Shield Saw — Throw Damage: Turns the throw from a situational tool into a consistent opener.
- 7Plasma Rifle — Fire Rate: Needed to strip energy shields quickly enough in crowded fights.
- 8Rocket Launcher — Proximity Detonation: Quality-of-life upgrade that significantly reduces missed shots against moving targets.
The BFG and Chaingun should receive resources only after this core list is complete.
Difficulty Tips — From Hurt Me Plenty Through Ultra-Nightmare
Hurt Me Plenty (Normal)
The intended first-playthrough experience. Enemy aggression is moderate, parry windows are forgiving, and ammo drops are generous. Use this run to internalize weapon switch habits, Shield Saw throws, and the timing of Glory Kill transitions. Do not rush through — Hurt Me Plenty is where muscle memory for combat rhythms gets built. If a section feels frustrating, it almost always means you've defaulted to retreating instead of engaging.
Ultra-Violence (Hard)
Enemy damage output increases significantly and armor drops decrease. The most important adjustment at this difficulty is never taking unblocked hits. On Hurt Me Plenty, tanking a hit or two is recoverable. On Ultra-Violence, unblocked heavy demon attacks remove 30–40% of your health bar. The Shield Saw block system is no longer optional — it is mandatory. Parry every blockable attack. Throw your shield against grouped enemies before closing to reduce incoming threat.
Boss fights at Ultra-Violence require specific phase knowledge. Study each boss's tell animations rather than playing reactively. The Siege Titan's ground-slam is blockable — most players don't realize this until they've died five times to it.
Nightmare
Enemies become significantly faster and more aggressive. Enemy AI prioritizes flanking behaviors — staying in one position for more than two seconds makes you vulnerable from angles you're not watching. Constant movement between blocks and attacks is required.
At Nightmare, every upgrade decision matters. If you haven't completed the Parry Window Extension and Shotgun Stagger upgrades by the third campaign chapter, the mid-game will punish you. Bosses have increased health pools and reduced stagger durations — Chainsaw kills for ammo restoration become critical in extended boss phases.
The BFG becomes a survival tool rather than a damage bonus at Nightmare. Save charges for the moments a fight tilts against you, not for the moments you want extra damage.
Ultra-Nightmare (Permadeath)
There are no checkpoints. Death ends the run from the beginning. This difficulty is not intended as a first-playthrough option — complete at least one run on Nightmare before attempting it.
Key Ultra-Nightmare principles:
- ▶Parry everything blockable. A missed parry is recoverable on lower difficulties. At Ultra-Nightmare, the chip damage from blocked but not parried hits accumulates into a death across a full chapter.
- ▶Never pull out the Chainsaw in melee range of multiple enemies. The Chainsaw kill animation leaves you stationary. On Ultra-Nightmare, that stationary period is lethal against active threats.
- ▶Use the Crossbow to pre-clear. Every enemy you remove before entering an arena is an enemy that can't kill you during the fight. Take the time to thin compositions from range even when the game's pacing suggests rushing forward.
- ▶Boss memory is everything. Every major boss fight in The Dark Ages has a consistent attack rotation. Learn rotations on lower difficulties. On Ultra-Nightmare, predictable patterns are your survival framework.
Common Beginner Mistakes
Retreating instead of engaging: The most universal mistake. Retreating removes you from Glory Kill range, cuts off health regeneration opportunities, and lets enemies spread to flanking positions. When pressure increases, step into it.
Ignoring the Shield Saw throw: New players treat the shield as a block-only tool and never throw it. This wastes the single most ammo-efficient crowd option in the game. Every arena fight should start with a shield throw into the largest enemy cluster.
Using the Shotgun against armored heavies: Pellet damage against physical armor is significantly reduced. Switching to Heavy Cannon or Rocket Launcher against armored targets isn't optional — it's required for ammunition efficiency. Players who shotgun everything run dry in the mid-campaign.
Hoarding the BFG: Players save the BFG so long that they finish entire chapters without using it. The BFG is not an emergency-only weapon — it is designed to be used whenever a fight tilts against you. A BFG charge spent to win a difficult encounter is better than dying four times and carrying unused charges into a checkpoint.
Not upgrading the parry window early: The parry system feels inconsistent and punishing without the window extension upgrade. Players who haven't purchased this upgrade often conclude that parrying "doesn't work" — the upgrade is what makes the mechanic function as designed. It's the first thing you should buy, every run.
Forgetting weapon switching: Players who find a weapon they're comfortable with and stop switching miss the damage multipliers built into the combat system. Certain demons take 40–60% more damage from their elemental weakness. The game actively rewards players who build the habit of switching weapons per target type.
Ready to Start?
DOOM: The Dark Ages is a confident, deliberate evolution of the franchise. Its Metacritic 85 reflects a game that takes genuine risks with its design and mostly lands them. The weapons feel distinct, the Shield Saw rewards investment, and once the push-forward philosophy clicks, the combat is deeply satisfying.
The learning curve is real, particularly around the parry system and the reduced mobility compared to Eternal. But every tool you need to succeed is available from the first chapter — it's a question of building the right habits early and resisting the instinct to retreat when fights get hard.
Start with Parry Window Extension. Throw your shield. Stay in the demon's face. The rest follows.